Table of Contents
Bowling Bro
 GitHub
Tags: Python, OCR, Flask
This is a passion project I’m trying to tackle with my friend Jarred Siriban to benefit our bowling group and any other passionate bowling enthusiast. There’s not much progress on it since we’re both busy, but it will get done eventually. The goal is to have a web application that can calculate the bowling score of any valid combination of frames and to submit and track game records so individuals can see their bowling progression and high scores. Additionally, we want the web application to track and provide statistics of a user’s performance, so they can monitor their improvement over time.
To achieve this, we will be using Flask to develop our web application and use optical character recognition (OCR) with PyTesseract to read bowling scores from an image. Since this is a dynamic website and we cannot host it on GitHub like my other projects, we might host this project using AWS. I heard that the price isn’t that bad compared to other options. In all honestly, the tech stack still isn’t decided since we’re just trying to get the OCR working properly before even starting to do anything else, so what we decide to use for our tech stack could very well change.
Personal Website (this)
Tags: Hugo, Tailwind CSS, GitHub Pages, NodeJS, GO, PostCSS, PurgeCSS, AutoPrefixer, Hugo Modules, Markdown, Prettier, Jshint
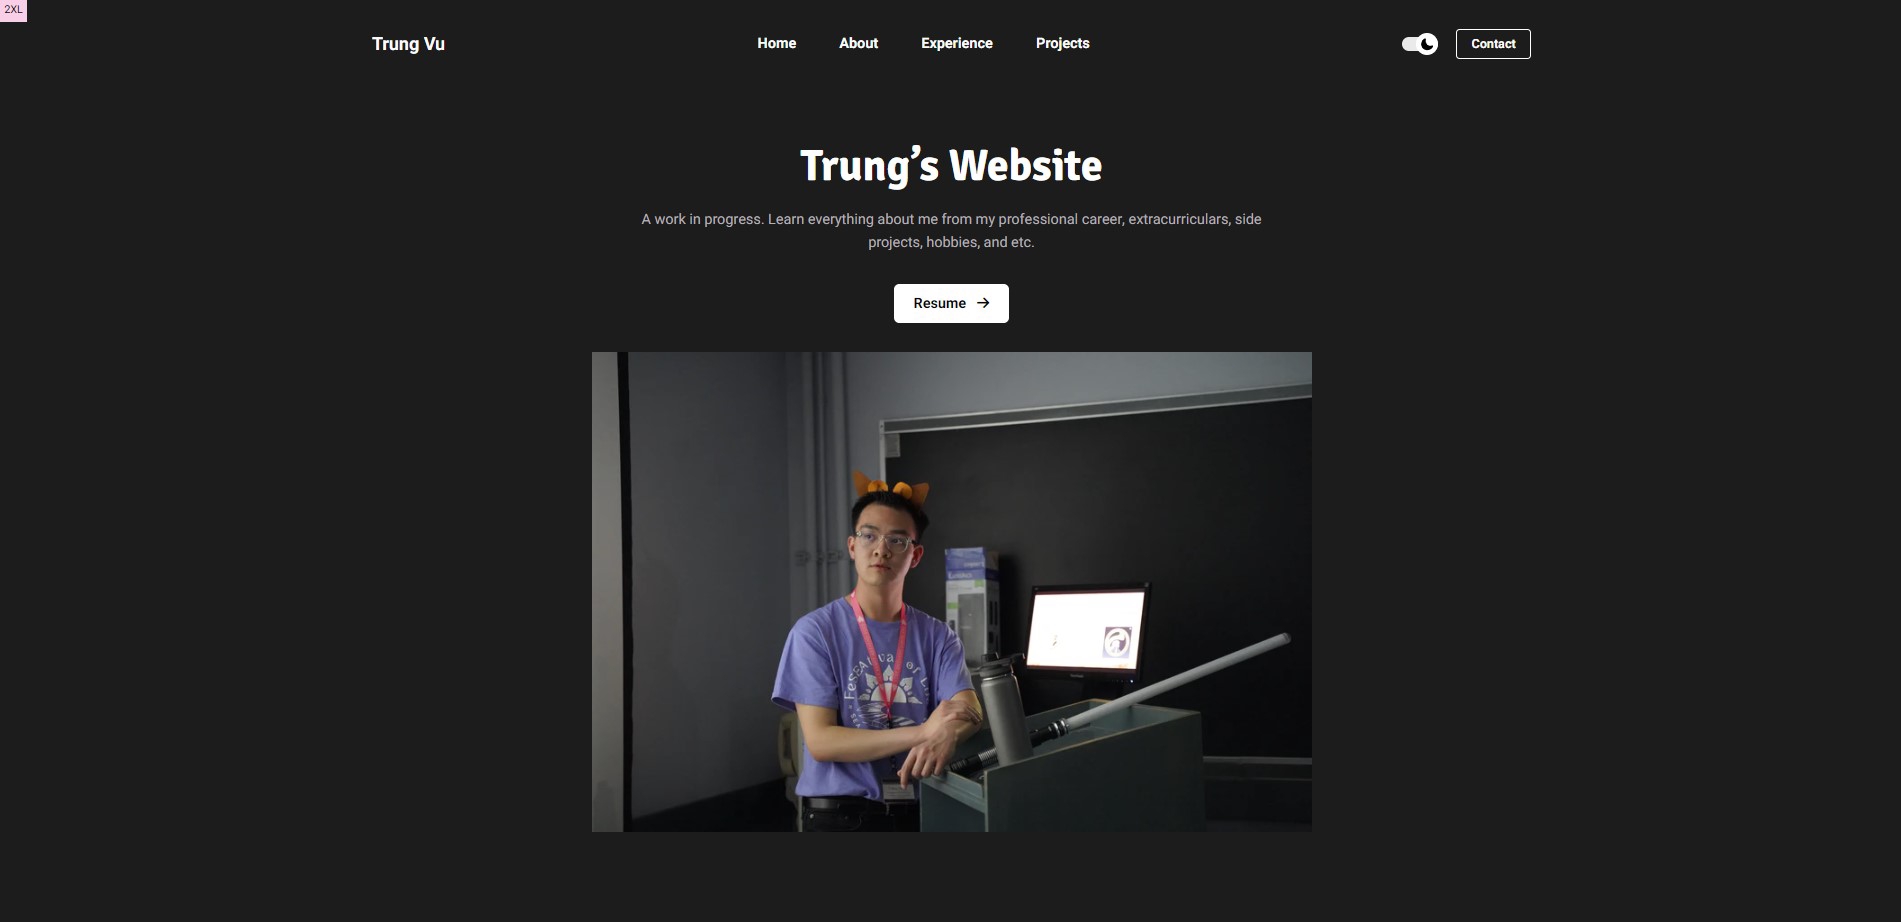
My own website created with Hugo and TailwindCSS using an open-source template and hosted on GitHub Pages.
Creating a personal website is not only great for marketing, but it’s also just great for getting more experience with different languages and frameworks quickly. I became interested in building a website after my intern buddy, Mihir, convinced me to buy a custom domain. I bought the domain through Google Domains for $12/yr (and hope it’ll stay at that price), but since Squarespace acquired Google Domains in Sep 2023, I don’t know if they’ll mark up the price. Anyways, I didn’t want to create the website from scratch because I have no artistic/design ability, so I looked for a template to use. I went through two templates from two of the most popular static site generators, Jeykll and Hugo, and found a nice template on Hugo. There are tradeoffs to using either Jekyll or Hugo, but both are easy to get into and for my purposes, the tradeoffs aren’t a big deal. This article sums up the tradeoffs quite well.
One of the pros of using a template is that you don’t need to develop from scratch. That being said, one of the cons is you are given a large codebase with lots of files you don’t understand. The template I found was nice, but it didn’t have lots of documentation on how to use it. I was adding/deleting code here and there to slowly figure out what was connected to what, but I ultimately decided to do some tutorials and learn how Hugo worked. The tutorials by Magsther and 4BES.NL were quite helpful. With that, I became modifying the template to fit my needs and got my website up and running. I hosted it on GitHub Pages because its free. GitHub Pages automatically builds your site when you push changes to your repo, so that created less hassle for me. To serve my site from my custom domain rather than GitHub’s default of user_name.github.io, I modified the repo settings and also did some configuration on Google Domains. This GitHub article summarizes the process quite well.
After 2 weeks of having the website, I got bored of the template and it’s lack of flexibility, so I moved to a different template called Hugoplate . This one had more documentation, support, and flexibility. By modifying certain files, I fit the website to my needs. More specifically, I modified .html files to add more buttons on the homepage so I can link both my resume and CV. I also modified .scss files to prevent overflow text in the Experience page from being clipped. This was actually quite fun because on top of learning how scss worked, I had to use inspect element to figure out how the class name of the parts I wanted to modify the styling of. Beyond this, I modified various .md, .json, and .toml files to change the site layout and add my personal information.
I don’t think there’s going to be a point where I just stop improving/developing this website. There’s a lot I want to do with it such as utilizing the Blog page. Also, my resume and CV change practically every month, so I need to come back and update links anyways. But yeah, I strongly encourage people to build a personal website. It’s fun, useful, and also a cool flex!
Let’s Ergo
Tags: Verilog, FPGA, Python
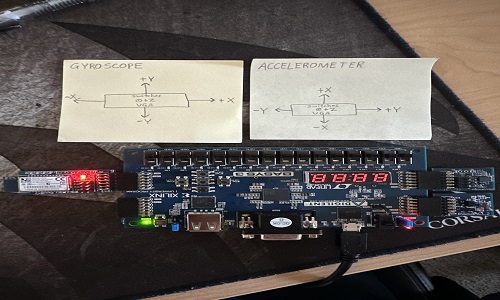
This project was done in collaboration with my Eva Fiedler. Together, we created Let’s Ergo: a fall detection and ergonomic system. The product collects data from an accelerometer and gyroscope and opens a specific YouTube video when certain acceleration and angular velocity magnitude thresholds are met.
The motivation behind this project was the fact that the elderly are the most vulnerable group in society. The elderly have more fragile bodies and are more prone to cramping than other age groups. While fall detection systems like Life Alert exist, they are limited in that a user must press a button before emergency services are called. What if a user is unable to press the button after falling? Our product strived to improve upon this limitation by automatically “calling” emergency services (opening a YouTube video) when a fall is detected. Beyond this, a great method to prevent cramping is stretching. Corporate companies have apps installed on all their devices which remind employees to stretch after certain periods of time. Our product does the same for the elderly.
To implement this project, we utilized the BASYS-3 FPGA and its seven-segment display and switches. We also utilized the ACL2 and GYRO PMODs. These components were utilized via a C program that ran on the FPGA. We also concurrently ran a Python script on a laptop to read from the FPGA and open a web browser to play the YouTube videos when necessary.
Pong!
Tags: Verilog, FPGA, VGA
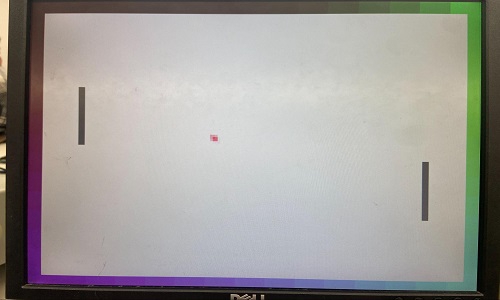
This project was done in collaboration with my buddies Annie Xiang and Nat Nguyendinh. We created a 2-player game called PONG!. The game was programmed using Verilog through Xilinx ISE and is displayed on a VGA monitor while the scoreboard is displayed on the seven-segment display of the DE10-LITE FPGA. In this game, players compete against each other using paddles to hit a ball into the opponent’s goal. The ball bounces off the top and bottom sides of the VGA monitor. Each player has two buttons to move their paddle up and down. If a player lets the ball enter their goal, the current round ends with the opposing player gaining a point. Both players play up until one player gets 5 points or the game is reset using the RESET button.
The game is displayed on a VGA monitor and starts upon pressing the START button. Before the START button is pressed, a color gradient is displayed as the start screen. Upon starting the game, two paddles appear on the right and left of the screen and a ball appears in the center of the screen, moving towards a player. Additionally, a scoreboard appears on the seven-segment display starting with 0 points for each player. Player 1 and player 2 can each move their respective paddle using the buttons on external button modules. Each player has a button to move their paddle up, and another button to move their paddle down.
The players compete to bounce the ball with the paddle alternatingly and have their opponent miss the ball. Each time the ball is hit, its speed will increase until it reaches a maximum speed which it will then sustain. The round ends when one player misses the ball and it hits their side (i.e. Player 1 misses the ball and it hits anywhere on the left side of the screen). The player who misses the ball and lets it pass through their side loses the round. When a round ends, the scoreboard updates, giving 1 point to the winner and 0 points to the loser.
A new round starts with the ball appearing in the center of the screen and moving towards a player. The game will continue until a player gets 5 points, in which the game will go back to the start screen. At any point in the game, a player can push the RESET button to restart the game and scoreboard at any point and time, going back to the start screen and setting both scores back to zero.
To get a better visual understanding of what was just described along with a more detailed explanation, please watch our demo video linked above!
Uniqueness Test
Tags: ReactJS, GitHub Pages
I started this personal project because I was motivated to apply my computer science skills to develop something people will actually use. At the time, I was developing a workshop for Southeast Asian Admit Weekend (SEA ADMIT) with my friend Nat Nguyendinh and we were looking for an icebreaker activity to use. We didn’t want to have a boring, generic icebreaker, but we also wanted to respect the rules of SEA ADMIT and stay PG. I remembered how high schoolers and college students like doing the Rice Purity test and comparing scores. As such, I suggested that the icebreaker should be a family-friendly version of the Rice Purity test and volunteered to create one using the skills I learned from other personal projects and coursework.
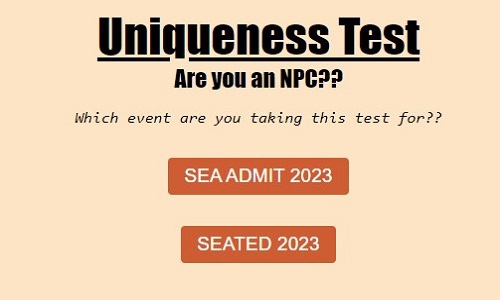
With Nat’s agreement, I began to develop the PG version of the Rice Purity test and called it Uniqueness Test. Uniqueness Test is a simple test that determines the uniqueness of an individual on a scale of 0 to 100. The closer one is to 100, the more unique they are. The closer to 0 one is, the more of an NPC they are. Of course, the test was designed for the purpose of entertainment and is by no means an accurate indication of one’s individuality.
The process of developing this game was actually simple. I created a React project and produced a list of sets to store 100 things Southeast Asian high school students may have done (i.e. joined Key Club, listen to Keshi, etc.). I curated this list mostly independently, but I got stuck after hitting 60 items and consulted my cousins to help me reach 100 items. With the Uniqueness Test being on a scale from 0 to 100, I set each item to represent 1 point and displayed all the items on the screen to the user. When users play the game, they start with 100 points and check all the items that they have done (i.e. went to prom). Each checked box subtracts one point from the initial 100 points and the score the user has after going through all the items is their uniqueness score. After implementing the game locally, I pushed the React project to GitHub Pages so anyone can access it during SEA ADMIT without having to download any pre-requisites.
The implementation of this game is clearly not that complex. In fact, the most difficult part of implementing this game was obtaining the styling I wanted through CSS and switching pages after the user clicks “Calculate Score”.
Despite its simple implementation, Uniqueness Test was a big hit! The SEA ADMIT attendees loved it, and the SEA ADMIT staff members raved over it as well. Given its success, I decided to create another version of the game when Southeast Asian Transfer Enrichment Day (SEATED) came around. Rather than catering the 100 items to be things high schoolers may have done, I made it to be things college students may have done since my audience this time was transfer students. I also took feedback from SEA ADMIT that 100 items were too much to scroll through, so I reduced the number to 50 and adjusted the points such that each item checked subtracts 2 points from the initial 100 points.
To have both versions of the game available to play, I modified the UI of the React project. Rather than having the game immediately appear when reaching the web page, I made a start screen showing buttons that indicated different versions of the game available and redirected users to the version of the game they selected.
Similar to SEA ADMIT, the game was a hit at SEATED as well. The attendees loved it and since there were only 50 questions instead of 100, there were not any complaints about the game being too long.
Wrapping this up, this was the simplest project I’d ever created. However, I found it to be one of the most fulfilling as my work actually served a real purpose. Uniqueness Test got used by over 150 people (to my knowledge) and helped SEA ADMIT and SEATED attendees create happy memories during their short visit to UCLA. This is something none of my other projects achieved. I realized that sometimes the most complex project isn’t going to win the hearts of others. The projects that succeed are the ones developed with enough complexity to serve the clients’ interests and responsive to their feedback.
Digital Audio Visualizer
Tags: SystemVerilog, FPGA, VGA
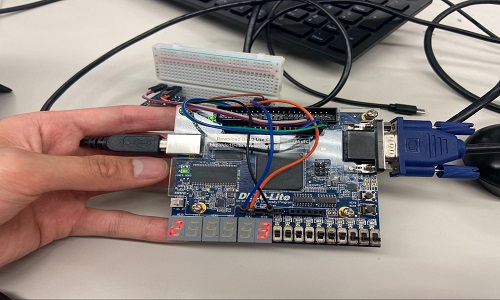
I worked on this project during my sophomore year with my roommate Christopher Jayadi and two other UCLA students. Digital Audio Visualizer (DAV) involved working with the DE10-LITE FPGA and constructing various mini-projects such as a calculator, piano, Flappy Bird, and an audio signal frequency visualizer.
I learned how to program in SystemVerilog to complete these projects and utilized Quartus Prime to write, compile, and analyze my code, run simulations, and program the DE10-LITE FPGA. I also learned how to use the various components of the DE10-LITE FPGA such as the microphone and 7-segment display. Additionally, I learned how to display to a VGA monitor and realized how many issues there are with doing so such as pin assignment, clock signal, sync signals, resolution mismatch, etc. With SystemVerilog being my first hardware description language (HDL), The processes of learning how to program with it was quite bumpy. I had to orient my mind in a different way since all the code is running in parallel. After figuring out the syntax and how to “think in SystemVerilog”, I was able to get the hang of HDL programming and complete the projects.
I would say that while creating the design itself is hard, creating the testbench and figuring out all the cases to test is even more difficult. It was easy to develop test cases that covered the common cases, but creating tests for the edge cases took more time to think of. Thankfully, my team worked together and helped one another fill in any gaps that may have been missed.
Overall, I would say that doing DAV with my team was a fun and rewarding experience. UCLA’s Computer Science and Engineering major is a blend between computer science and electrical engineering, but the major coursework doesn’t have many opportunities for CSE students to work with HDLs and FPGAs. DAV helped me learn to program in SystemVerilog and work with FPGAs which helped significantly when I took a major course that involved FPGA programming with Verilog. The experience I gained from working with VGA monitors was especially useful.
Wordle PLUS
 GitHub
Tags: ReactJS, MongoDB, NodeJS, ExpressJS, Python, Bash
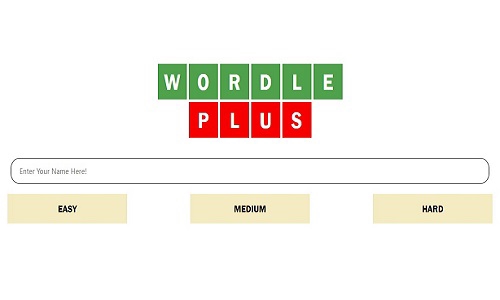
Wordle PLUS is a remake and improvement to the web-based word word game, Wordle, which was very popular in 2021 and 2022. The project improved on Wordle by allowing users to play the game with 4, 5, or 6 letter words and giving unlimited plays a day with a random word each time. Additionally, Wordle PLUS includes a score-based leaderboard to add a competitive element to the game. I worked on this project with 4 other UCLA students.
To create this full-stack web application, my group opted to use the MERN stack (MongoDB, ExpressJS, ReactJS, and NodeJS). MongoBD is a NoSQL database management system which held the username and score of each Wordle PLUS player. ExpressJS is a NodeJS framework that provides utility for building web applications and served as our backend framework. ReactJS is a front-end library and was used to build our web app’s user interface (UI). NodeJS is a server-side JavaScript runtime that allows users to run code on the server.
When approaching this project, my groups split into 3 teams: Leaderboard, Game Core, and UI. As the names suggest, each team oversaw one primary component of Wordle PLUS—creating the leaderboard, implementing the game logic, and creating a UI. The split was 1:3:1 for the teams respectively, with me being assigned to the Leaderboard team.
Before I started tackling my assigned tasks, I created the word bank for the Game Core team. This involved using Bash to get a dictionary of words from the web and Python to filter the dictionary and create three files containing words of 4, 5, and 6 letter length. This wasn’t particularly difficult since I worked with Bash before, and Python has great documentation.
With this done, I proceeded to develop the leaderboard. Thinking of how I wanted the leaderboard to look was not hard, and had I known how to program in React well, creating the leaderboard would have been very easy. Unfortunately, I had not programmed in React before this, so it was hard to figure out which methods to call and get the outcome I wanted. After lots of Googling and experimentation, I developed a leaderboard that listed a player’s username, score, and game mode played in numerical order. Additionally, I implemented buttons that would filter the scoreboard to only display player information from a specific game mode. I validated my leaderboard using local data I generated since the MongoDB database was not setup yet. Having completed this, I proceeded to set up the database and modified my code to read data from MongoDB rather than my local test data.
Since my portion of the project was done, I went on to help the other teams. The UI team finished around when I did without any complications, so we both went to help the Game Core team. Despite having 3 members, the Game Core team was having issues completing their tasks. More specifically, they were not able to send player information as such the username, game mode played, and score to MongoDB and did not know how to pull words from the word bank for each iteration of the game. Since I gained some experience on receiving data from MongoDB, I figured that I’m best suited to write the code to send data to MongoDB. After lots of Googling and experimentation, I was able to use ExpressJS and Axios to send all the player information to MongoDB. With that handled, I helped the team debug their code to successfully pull a random word from the word bank for each new iteration of the game.
Once each team completed their respective tasks, we ensured that all the code merged properly. Since we communicated well throughout the entire process and did incremental checks to ensure each team’s code mixed well together, we did not have any major issues here. With that, we successfully completed the project and have a working version of Wordle PLUS.
Although I was not directly working on some components of Wordle PLUS, I was still able to learn a lot about ReactJS and CSS since the group had weekly meeting where we did code reviews and helped each other improve our implementations. In fact, I really needed to master ReactJS since I had to understand the code I was working with when helping the Game Core team send player information to MongoDB.
All in all, completing this project with my group allowed me to learn how to do full stack development and work well in a team. Prior to this project, most of my experience was working on solo projects where I was responsible and had complete control over everything. This project taught me to trust and rely on others and communicate to fill in any knowledge gaps.
Wordle PLUS is not currently hosted online. If you are interested in playing the game, you will need to clone our repository and follow the instructions in the README to run the game locally. The MongoDB account created to store the data for Wordle PLUS is no longer active, so the leaderboard unfortunately does not work if you play the game now. I might work to host the game and reactivate the MongoDB account to have the leaderboard working again.
Fitness Form Protection Tool
 Demo
DemoTags: C, IoT, Machine Learning, STM32
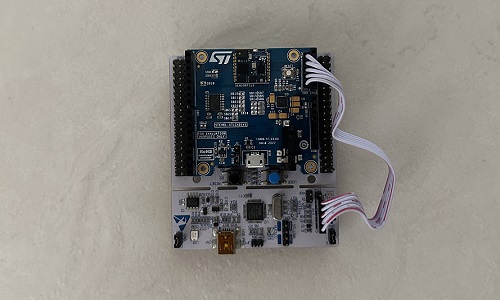
The Fitness Form Protection Tool is my first personal project. It is an Internet of Things (IoT) system that uses 2-state motion analysis to determine if a user has properly executed simple exercises (i.e. Russian twist, hip rises, sit ups). I developed the code for the project using C and the EmbeddedML Neural Network and ran the code on the STMicroelectronics SensorTile which hosts a STM32L4 microprocessor, accelerometer, and gyroscope as my IoT node.
My journey with this project was a difficult one as I ran into issues before I wrote a single line of code. When I attempted to connect the SensorTile to my laptop, it would not appear in device manager. With my limited knowledge in tech at the time, I had no idea what the issue was. I tried plugging in the SensorTile to different USB ports and even attempted connecting it to my desktop to see if it would detect. Nothing worked.
After some research and further experimentation, I concluded that the micro-USB cable I used to connect the SensorTile to my laptop was the issue. USB cables have two categories: charging cables and data cables. While most USB cables are charging cables, not all are data cables. Furthermore, with tech, there will always be defects every now and then. Such was the case with my cable. Although I bought a micro-USB cable that was capable of data transfer, the cable was not transferring data at all which resulted in the SensorTile not being detected in device manager. After I bought a non-faulty micro-USB cable, data transferred normally and the SensorTile was detected in device manager.
This little setback, although annoying, taught me a fair amount about USBs, USB ports, and USB/device compatibility. Before reaching the conclusion I mentioned above, I looked into how USB ports would fail. I learned about how dust can contribute to the buildup of static electricity that can completely bust a USB port. I also learned how some USB devices may not be fully compatible with certain USB ports or have other issues that can impact the port’s performance. Furthermore, I learned about USB ports can get damaged by power surges or overloading when a device of poor quality or device demanding too much power gets plugged in.
But I digress. As I moved on to develop IoT motion detection functionality, I was overwhelmed by the sheer amount of starter code. It took me a few days to fully understand the codebase and understand what purpose each function served and how the program flowed. Once I understood the code well, I explored how the SensorTile’s accelerometer and gyroscope worked. It was fun experimenting with various speed and rotation thresholds to see how motion detection got affected. Beyond messing with thresholds, I also played around with 2-state motion detection. After developing the code to facilitate 2-state motion detection, I modified whether the first and/or second state would utilize the accelerometer or gyroscope. I tested the various combinations to see which would yield the best performance when distinguishing simple exercises. Lastly, I modified the neural network to see how motion classification got affected. With an understanding of how certain modifications to the neural network would affect classification, I set parameters that would provide the best performance in distinguishing exercises from one another and determine whether the performed exercise was done properly.
After much trial and error, I was able to develop IoT motion detection functionality and successfully developed an IoT node that can determine if a user has properly executed a simple exercise. I’m proud of this project as it was my first engineering project. It also opened the doors to many opportunities which have further advanced my career.